Reference Image Workflow
AI Reference Image Guide: Keep Faces and Products Consistent
Learn how to use reference images with AI, write preserve-change-finish prompts, combine multiple references, and keep faces and products consistent.
In this guide
An AI reference image gives the model visual information that is difficult to describe completely in words. Use one when you need to keep a face recognizable, preserve a product’s shape, follow a composition, or carry one visual style across several images. The most reliable prompt tells the model what to preserve, what to change, and how to finish the new image.
The reference does not replace the written prompt. It supplies the visual evidence; the prompt assigns that evidence a job. A useful instruction might say, “Use the first image for identity, preserve the face and hairstyle, change the wardrobe and background, and finish as a softly lit editorial portrait.”
This AI reference image guide covers the complete workflow, including one-reference and multiple-reference prompts, six copyable examples, and a consistency checklist for faces, products, compositions, and campaign systems.
How to use a reference image with AI
For a strong first result, follow this sequence:
- Choose a clear source. Use an image where the face, product, pose, or layout you care about is easy to see.
- Assign the reference a role. State whether it controls identity, product geometry, composition, wardrobe, material, or visual style.
- List the invariants. Name the two to five details that must remain recognizable.
- Describe the change. Specify the new scene, pose, background, wardrobe, camera angle, or art direction.
- Define the finish. Add medium, lighting, palette, crop, aspect ratio, and intended use.
- Review the preserved details first. A beautiful image is still a failed edit if it loses the face, shape, or layout that made the reference necessary.
If the source contains private, client-owned, or copyrighted material, confirm that you have permission to upload and transform it before starting.
When a reference image is the right tool
Use a reference when the source contains information that is important and hard to reconstruct from text. If none of the following constraints matter, a text-to-image workflow may be faster.
Identity and facial consistency
A portrait reference can carry recognizable facial structure, hair, and other identity cues into a new setting or art direction. Keep the written prompt focused on role, expression, wardrobe, lighting, crop, and background rather than trying to redescribe the person’s face from memory.
Reference input does not guarantee a perfect likeness. Compare the result carefully, especially when the image represents a real person in a professional, commercial, or public context.
Product shape and material
Product references help when silhouette, packaging proportions, controls, labels, or material transitions matter. The prompt can then direct the new scene: studio or lifestyle context, camera angle, lighting, supporting objects, and campaign mood.
Generated details and text still require inspection. If a logo, ingredient label, price, measurement, or regulatory statement must be exact, restore or verify it in the final production file.
Composition, pose, and layout
A reference can establish viewpoint, pose, object arrangement, negative space, or the relationship between foreground and background. This is useful when you want a different subject or style without losing the original visual hierarchy.
Style and campaign continuity
An approved result can become the reference for the next campaign variation. Reusing palette, lighting direction, materials, lens feel, texture, and shape language helps separate images feel like one system.
The preserve-change-finish prompt framework
Reference-image prompting becomes clearer when one instruction separates three jobs.
1. Preserve
Name the features from the source that define success. Be selective and concrete.
Useful preserve instructions include:
- preserve the person’s identity, face shape, eye spacing, and hairstyle
- preserve the bottle silhouette, cap geometry, and brushed steel material
- preserve the seated pose and three-quarter camera angle
- preserve the room layout and window position
- preserve the cobalt palette and hard upper-left light
Avoid saying “keep everything the same” when you also want a major transformation. That leaves the boundary unclear. List the characteristics that create continuity instead.
2. Change
Describe only the transformation you need. Common changes include background, wardrobe, expression, time of day, season, camera distance, supporting objects, or art direction.
For a portrait:
Preserve the person’s identity, face shape, and short dark hair. Change the casual snapshot into a chest-up professional editorial portrait with a calm direct gaze, navy overshirt, warm gray studio background, and soft directional light.
For a product:
Preserve the uploaded bottle’s silhouette, cap, label proportions, and brushed steel material. Place it on a dark stone pedestal in a clean studio scene with cool rim light, subtle condensation, and a wide campaign composition with empty space on the left.
3. Finish
Finish describes how the image should look and where it will be used. Include the medium, texture, light behavior, crop, aspect ratio, and production needs that actually affect the result.
Useful finish instructions include:
- realistic editorial photography with natural surface texture
- premium ecommerce lighting with controlled reflections
- tactile cut-paper illustration with restrained shadows
- vertical poster composition with clear type-safe zones
- square profile crop with an uncluttered background
Separating finish from the transformation keeps the prompt readable and makes later revisions easier.
A reusable AI reference image prompt template
Start with this prompt image template and replace the bracketed fields:
Use the uploaded image as the reference for [identity, product, composition, or style].
Preserve [two to five specific invariant features].
Change [the scene, wardrobe, pose, background, or other transformation].
Finish as [medium, lighting, palette, crop, aspect ratio, and intended use].
Do not change [one or two critical exclusions].
The final exclusion line is optional. Use it for a few high-impact boundaries, such as “do not add extra packaging” or “do not change age.” Long negative lists often compete with the main direction.
The AI image generator with reference image workflow provides a focused entry point for trying this structure.
How to prepare the source image
The model can only use visual information that is clear in the source. Choose the reference around the detail you need to preserve.
For a face, use adequate resolution, visible facial features, and lighting that does not hide important structure. For a product, avoid motion blur, severe perspective distortion, or props that cover the silhouette. For a pose or composition, make sure the hierarchy and camera angle are obvious.
Crop only when it makes the reference role clearer. A tight portrait crop may help identity, while a full-body source is more useful for pose and wardrobe. For products, include the full outline and any distinguishing controls, openings, or material transitions.
How to use multiple reference images
Multiple references work best when each image has one named responsibility. Do not ask the model to infer which source controls which property.
Use language such as:
Use image 1 for the person's identity and facial features.
Use image 2 for the standing pose and camera angle.
Use image 3 for the navy wardrobe and studio color palette.
Preserve the identity from image 1 above all other references.
Combine these roles into a realistic full-body editorial portrait with soft side light.
If two references disagree, state the priority. For example, let the identity image control the face while the wardrobe reference controls clothing only. Fewer, well-assigned references are usually easier to direct than a large moodboard with overlapping jobs.
Six reference image prompt examples
Professional portrait from a casual photo
Use the uploaded portrait as the identity reference. Preserve facial structure, eye color, hairstyle, and natural proportions. Change the scene into a chest-up founder portrait with a relaxed direct gaze, simple charcoal overshirt, and warm gray studio backdrop. Use soft directional window-style light, natural skin texture, restrained editorial retouching, and a square professional profile crop. Do not add accessories or change age.
Consistent character in a new scene
Use the uploaded character sheet as the character reference. Preserve the face shape, short copper hair, round glasses, green jacket, and compact body proportions. Place the same character at a rainy train platform holding a yellow umbrella. Finish as a hand-painted animated film still with soft reflections, cool evening light, and a wide cinematic composition. Do not redesign the outfit or facial features.
Product campaign variation
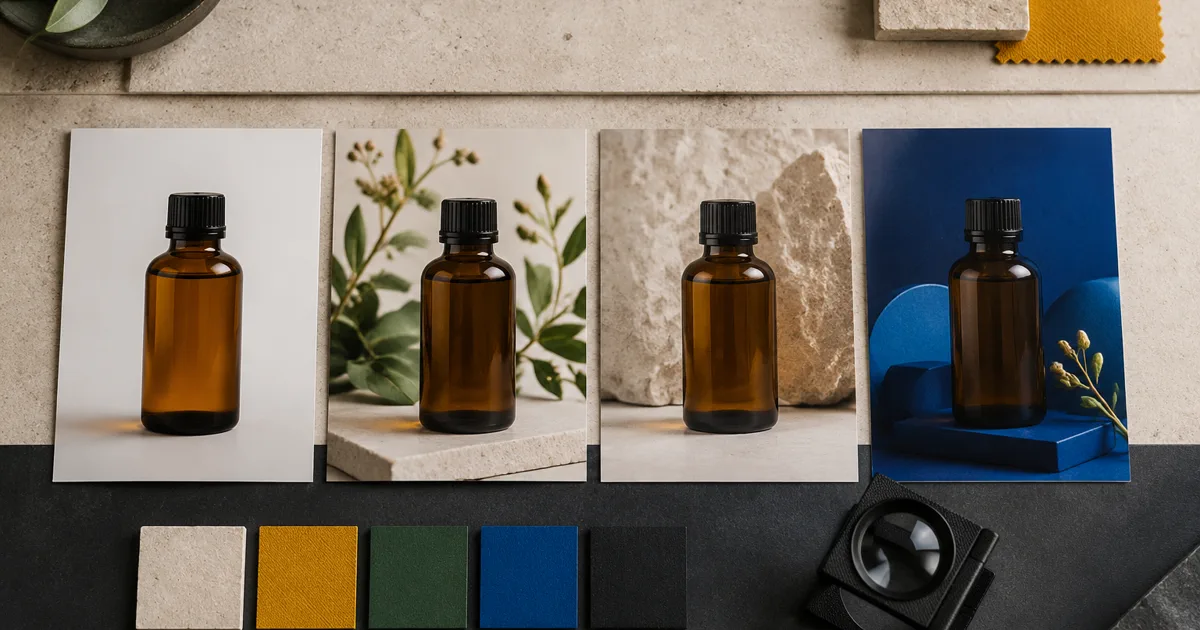
Use the uploaded product image as the shape and material reference. Preserve the bottle silhouette, cap geometry, label placement, and translucent amber glass. Move it into a quiet bathroom campaign scene on pale limestone with a folded white towel and one small botanical accent. Use soft morning side light, realistic contact shadows, controlled reflections, and a wide ecommerce composition with copy space on the right. Do not alter the package proportions.
Same composition in a new style
Use the uploaded image as the composition reference. Preserve the low viewpoint, central cyclist, diagonal road, and distant mountain scale. Reinterpret the scene as a layered screen-print illustration with bold flat shapes, deep blue, coral, and pale cream inks, subtle paper grain, and a vertical travel-poster format. Keep the road and cyclist as the primary visual path.
Interior redesign with the same layout
Use the uploaded room as the layout reference. Preserve the wall openings, window position, ceiling height, and camera viewpoint. Replace the furniture and finishes with a calm Japandi interior: low oak seating, textured off-white fabric, one paper pendant, pale limewash walls, and minimal ceramic objects. Finish as realistic architectural photography in soft overcast daylight.
Campaign continuity from an earlier result
Use the uploaded campaign image as the visual-system reference. Preserve the cobalt and warm off-white palette, hard upper-left key light, rounded modular shapes, and clean product-stage geometry. Create a companion scene for the second product with a different pedestal arrangement while keeping the same lens feel, material finish, contrast, and amount of negative space.
For more text-only starting points, browse 12 AI image prompt examples.
How to evaluate consistency
Review the output against the preserve list before judging its style. Compare the result beside the source at the size where it will actually be used.
Face and identity checklist
- face shape and relative feature placement
- eye spacing, nose, lips, and jawline
- hairline, hairstyle, and visible age cues
- accessories that should remain or stay absent
- natural proportions under the new pose and crop
Product checklist
- silhouette and package proportions
- openings, controls, seams, and edge details
- material transitions and surface finish
- label position, logo placement, and required text
- believable reflections, contact shadows, and scale
Composition checklist
- viewpoint and camera distance
- focal point and scale relationships
- negative space and visual hierarchy
- foreground-to-background path
- crop and aspect ratio for the final placement
Visual-system checklist
- palette and contrast
- light direction and softness
- texture and material language
- lens feel and depth of field
- spacing and recurring shapes
Common reference image problems
The result copies details that should change
The preserve instruction is probably too broad. Replace “keep the image the same” with a short list of true invariants, then put the requested transformation immediately after it.
The result loses the face or product shape
Move the reference role and invariant features to the beginning. Reduce competing style instructions, use a clearer source, and make one controlled change at a time.
The new background does not match the subject
Direct the physical light. State its direction, softness, color temperature, contact shadows, and reflections so the subject and environment belong in the same scene.
Multiple references compete
Assign one job to each reference and state which image has priority. Remove any source that does not control a necessary property.
Generated labels or text drift
Treat text as a production step. Use the generated image for visual direction, then restore verified logos, labels, prices, dates, and required copy in the final design file.
AI reference image FAQ
What is a reference image in AI image generation?
A reference image is an uploaded source that guides a new generation or edit. Depending on the instruction, it can provide identity, product shape, composition, pose, material, palette, or style information.
How do I keep the same face in AI images?
Use a clear, permitted portrait as the identity reference. Put identity first in the prompt, name a few features that must remain stable, and limit the first transformation. Always compare the output with the source because no prompt guarantees exact likeness.
Can I use two or more reference images?
Yes, when the selected image workflow supports multiple uploads. Give each reference one explicit role, such as identity, pose, wardrobe, or style, and state which source wins if the images conflict.
Should I describe everything visible in the reference?
No. Describe the reference’s job and the features that matter. Spend the rest of the prompt on the requested change and final use. Redundant description can make the instruction longer without making the boundary clearer.
Can a reference image preserve exact product text or logos?
It may help with placement and broad appearance, but important text and brand details still need human verification. Restore exact logos, labels, prices, measurements, and legal copy in the final production file.
Build consistency through controlled reuse
Reference images work best inside a deliberate sequence. Start with a clear source, write the preserve-change-finish prompt, and review the invariant features first. Once a result establishes the desired visual language, use that approved result as the reference for the next variation.
Keep a record of the source role, prompt, canvas, and decisions that produced the approved image. That record turns one successful result into a repeatable creative system instead of an isolated experiment.
Put the workflow into practice
Create a focused first image
Start with included credits, keep the prompt and references together, and refine the result in your private Imagine workspace.
Open Imagine