Prompt Writing
How to Write AI Image Prompts: The Practical Guide with Tested Examples
Learn how to write high-impact AI image prompts with a tested 4-part framework. Explore the best AI photo prompts, camera controls, lighting cues, and examples.
In this guide
Writing a useful AI image prompt is less about finding a secret magic keyword and more about making visual decisions in a clear, deliberate order. A strong prompt tells the model what matters, what can vary, and what the final image is meant to accomplish. When those decisions are mixed together or left implicit, the resulting image may look aesthetically pleasing while still missing the intended creative brief.
The most reliable approach is to treat a prompt as a compact creative brief. Start with the subject, direct the composition, define the visual language, and finish with the intended use. This framework works across portraits, product photography, editorial illustrations, campaign concepts, and most modern text-to-image workflows.
You do not need to specify every pixel. You do need to identify the key decisions that make one result useful and another result wrong.
What a Strong AI Image Prompt Actually Does
A strong prompt reduces ambiguity without removing all room for artistic interpretation. It establishes a hierarchy: the central subject comes first, the arrangement supports it, and the style serves the intended use.
Consider this short request:
Create a product image of a reusable water bottle.
It identifies the object, but almost everything else remains open. The model still has to guess the camera angle, background, lighting, material treatment, color palette, and where the image might be used. A more directed version might be:
Premium product hero image of a matte steel reusable water bottle, three-quarter view on a cool gray pedestal, subtle condensation, crisp blue rim light, realistic studio reflection, wide ecommerce campaign composition with clear negative space on the left.
The second prompt is not better because it is longer. It is better because each phrase controls a different visual decision. You can replace the bottle, change the light, or move the negative space without rewriting the entire idea.
The Four-Part Prompt Framework
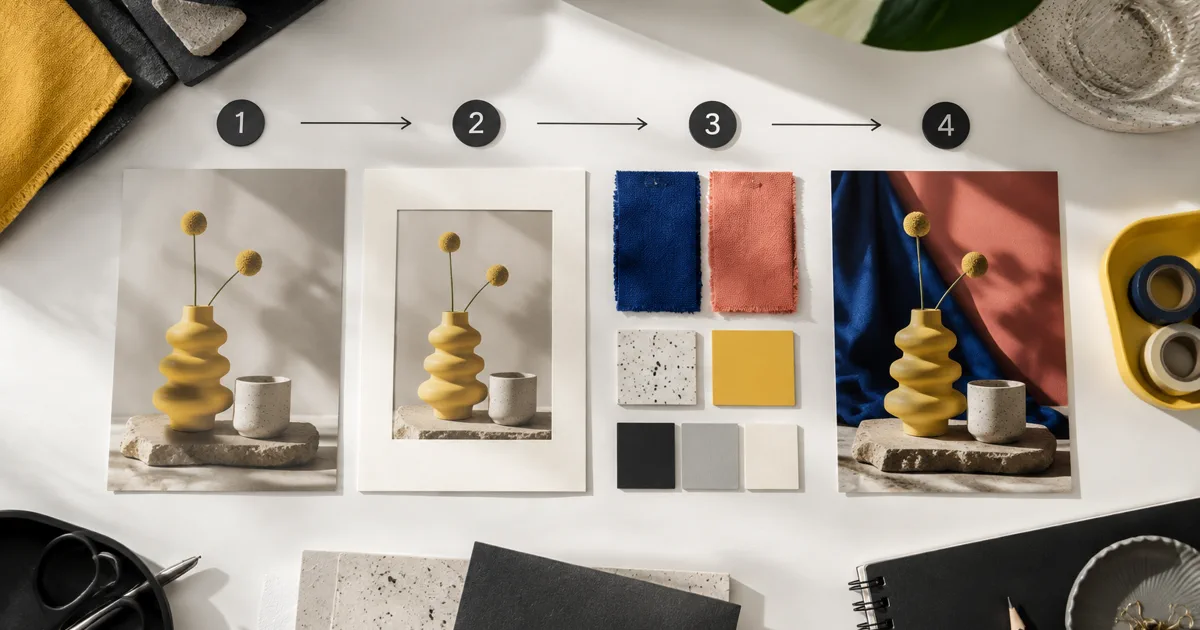
Use four sections when turning an idea into a production-ready prompt: subject, composition, visual language, and intent. You can write them as one paragraph, but thinking in sections makes the prompt easier to debug.
1. Define the Subject
State what the viewer should notice first. Include the attributes that must remain recognizable and omit details that do not affect the image.
For a person, useful details may include role, expression, wardrobe, pose, and age range. For a product, they may include shape, material, color, surface finish, and packaging. For an environment, identify the location, season, time of day, and the activity happening there.
Compare these subject descriptions:
- Weak: “a founder”
- Directed: “a climate-tech founder in a navy overshirt, calm direct gaze, natural expression”
- Weak: “a coffee package”
- Directed: “a compact matte-black coffee pouch with a small cream label and visible folded seal”
Avoid packing the subject line with unrelated style terms. First make the object or person unambiguous. Style comes later.
2. Direct the Composition
Composition explains how the subject occupies the frame. This is where you set viewpoint, crop, depth, hierarchy, and negative space.
Useful composition language includes:
- close-up, chest-up, full body, wide establishing shot
- eye level, top-down flat lay, low angle, three-quarter view
- centered, asymmetrical, foreground-led, layered depth
- shallow depth of field or deep architectural focus
- negative space on a specific side for later copy
- square profile crop, vertical poster, or wide campaign banner
Be precise about placement only when placement matters. “Bottle on the right with open space on the left” is useful for a landing-page banner. Adding left and right directions to a standalone portrait may only make the prompt brittle.
3. Build the Visual Language
Visual language combines medium, lighting, palette, texture, and overall art direction. Choose a few cues that reinforce one another rather than listing every attractive style adjective you know.
For photography, direct the light and physical finish: soft window light, hard midday sun, controlled studio highlights, natural skin texture, glossy reflections, or subtle film grain. For illustration, name the medium and shape behavior: editorial vector illustration, hand-painted cel texture, risograph print, dimensional paper collage, or clean 3D render.
A coherent visual-language phrase might be:
Quiet editorial product photography, soft directional window light, warm gray and muted green palette, natural shadows, restrained premium finish.
An incoherent phrase might combine “minimal,” “maximalist,” “photorealistic,” “flat vector,” “neon noir,” and “soft daylight.” Those directions compete instead of building a recognizable look.
4. Explain the Intent
Intent tells the model why the image exists. The same subject should be framed differently for an ecommerce listing, an editorial article, a social announcement, or a storyboard.
Include the destination and the response you want:
- “professional profile image that feels credible and approachable”
- “ecommerce hero image with room for price and product copy”
- “event poster direction with clear top and bottom type-safe areas”
- “calm onboarding illustration for a financial planning app”
Intent is especially helpful when aesthetic instructions alone could lead to several equally plausible results.
AI Photo Prompts: Controlling Camera, Lenses, and Lighting
When searchers look for AI photo prompts, they are rarely looking for generic digital art. They want images that mimic physical camera hardware and optical physics.
Modern multimodal models (such as Nano Banana and GPT-Image) have extensive training on real photography terminology. Specifying realistic optical settings produces vastly superior results compared to quality buzzwords:
Focal Length and Perspective
- 24mm / 28mm Wide Angle: Captures environmental context, landscape scale, or the natural edge distortion found in smartphone selfies and casual mirror photos.
- 50mm Standard: Natural human field of view, ideal for documentary-style street scenes and casual lifestyle captures.
- 85mm Telephoto Portrait: Compresses facial features flatteringly, creating creamy circular background bokeh while keeping eyes and lips crisp.
- 100mm Macro: Emphasizes fine textures, water droplets, fabric weaves, and cosmetic packaging details.
Studio and Ambient Lighting Physics
- Soft North Window Light: Diffused, flattering illumination with gentle shadow falloff across the face or subject.
- Rembrandt Lighting: High-contrast studio setup casting a signature triangle of light on the shadowed cheek.
- Golden Hour Backlighting: Warm 3200K ambient sunlight creating bright rim highlights along hair or product silhouettes.
- Harsh Xenon Direct Flash: Stark, high-contrast drop shadows reminiscent of 90s disposable camera aesthetics.
Best AI Prompts for Images: Comparing Weak vs. Strong Instructions
To write the best AI prompts for images, eliminate vague buzzwords and substitute observable physical direction.
Example 1: Editorial Lifestyle Portrait
- ❌ Weak Prompt:
beautiful woman, portrait, photorealistic, 8k, hyperrealistic, octane render, trending on artstation - ✅ Best AI Prompt:
Chest-up editorial portrait of an architect in her late twenties, warm thoughtful gaze, wearing a minimalist cream knit sweater. Seated in a sunlit loft with concrete walls softly blurred in the background. Soft 45-degree morning window light from camera left, shot on an 85mm f/1.8 lens, natural skin texture with visible pores, no artificial digital airbrushing.
Example 2: Premium Commercial Product
- ❌ Weak Prompt:
perfume bottle on a table, super realistic, luxury advertising, best quality - ✅ Best AI Prompt:
Commercial hero photograph of a faceted fluted glass perfume bottle with a brushed brass cap, centered on a chiseled travertine stone block. Soft directional sunrise light creating subtle refractions on the surface, gentle natural contact shadows, neutral warm gray backdrop, 100mm macro lens at f/4.0, generous negative space above for editorial headline typography.
A Reusable AI Image Prompt Template
Use this modular structure as a reliable starting point:
[Subject and essential attributes],
[viewpoint, crop, placement, and depth],
[medium, lighting, palette, materials, and texture],
[intended use, mood, and required negative space],
[important constraints].
For model-specific syntax rules, consult our deep dive on Nano Banana prompt structure. If you need ready-to-use prompt recipes across specific creative niches, browse our curated photorealistic AI image prompts and adaptable prompt examples.
Improve Prompts by Changing One Decision at a Time
The first result is information, not a final verdict on the prompt. Review it against the original goal and identify the largest mismatch.
If the subject is correct but the image feels generic, strengthen visual language. If the look is attractive but the image cannot hold a headline, change the composition. If the scene contains too many competing objects, clarify the focal point and remove secondary details.
A controlled iteration follows this sequence:
- Confirm that the subject is recognizable and complete.
- Correct framing, viewpoint, and hierarchy.
- Adjust lighting, palette, texture, and finish.
- Add production constraints such as negative space or aspect ratio.
- Generate a variation only after you know which decision you are testing.
Changing one or two dimensions at a time makes it easier to learn what each phrase controls. Replacing the subject, lens, light, palette, and style simultaneously may produce a different image, but it will not teach you why it changed.
Common Prompt-Writing Mistakes
Starting with Style Before the Idea
“Cinematic, award-winning, ultra-detailed” does not explain what the image should communicate. Establish the subject and goal before polishing the finish.
Using Adjective Stacks
Long strings of adjectives often repeat the same idea or introduce contradictions. Replace them with observable direction. Instead of “beautiful, premium, elegant, sophisticated,” describe the materials, light, spacing, and color decisions that create that impression.
Treating the Prompt as a Keyword Bag
Comma-separated keywords can work, but a readable brief is easier to reason about. Group related decisions and make the visual hierarchy explicit.
Ignoring the Final Format
An image meant for a vertical story should not be composed like a wide website banner. Decide the placement before you generate so the focal point and empty space fit the final crop.
Asking the Model to Finalize Critical Text
Image generation can establish a poster or interface direction, but important copy, labels, prices, and factual details should still be typeset and proofread in the final production workflow.
A Final Prompt Checklist
Before generating, check five questions:
- Can someone identify the main subject without guessing?
- Does the prompt explain where the subject sits in the frame?
- Do the lighting, palette, medium, and texture describe one coherent look?
- Is the intended use clear?
- Have you included only the constraints that genuinely affect success?
If the answer is yes, the prompt is ready to test in the Imagine workspace. Keep the first attempt, note what missed, and refine the specific decision that matters most.
FAQ
What is the best prompt formula for AI image generation?
The most reliable formula is: [Subject] + [Environment & Action] + [Camera Perspective & Lens] + [Lighting Source & Quality] + [Material Textures] + [Layout & Negative Space]. This provides the model with complete physical and structural context without relying on empty quality buzzwords.
How do AI photo prompts differ from digital art prompts?
AI photo prompts require realistic optical constraints: focal length (e.g., 50mm, 85mm), aperture depth of field, directional light sources (e.g., window daylight, softbox), and natural micro-textures (skin pores, fabric weaves). Digital art prompts emphasize medium and rendering technique (e.g., watercolor wash, vector linework, 3D clay render).
Why do quality buzzwords like “8K” and “photorealistic” degrade results?
Modern multimodal models like Gemini Nano Banana and GPT-Image treat quality buzzwords as stylistic tokens, often producing oversaturated colors, plastic-looking skin, and unnatural contrast. Specifying real camera lenses and lighting physics produces far more realistic results.
Can I use reference images to improve prompt accuracy?
Yes. When product geometry, logo placement, or specific facial likeness is essential, combining a structured text prompt with a permitted reference image provides the highest fidelity. Read our AI reference image guide for step-by-step instructions.
Put the workflow into practice
Create a focused first image
Start with included credits, keep the prompt and references together, and refine the result in your private Imagine workspace.
Open Imagine